Editor Tips
You can't trust the editor
What you see in the editor might not match what happens in the real game. You should always test your level out thoroughly to make sure it is doing what you expect.
Smaghetti's editor tries its best to mimick the real game. But there are just way too many combinations of entities. Most of the time, things work out just fine. But sometimes if you put two certain entities together in a new way, they may behave strangely in game, maybe even cause a crash.
Mario's position and the camera
Where Mario starts in a room has an influence on the camera. If you start him down low, then the camera will bias up high. If you start him about 3 or 4 tiles up from the bottom, the camera will be more balanced.
This is temporary, eventually Smaghetti will give you controls to configure the camera. But that probably won't get added for a good while.
The actors and stage layers
At the top of the editor, towards the right are two padlocks labeled "actors" and "stage". Actors are things like enemies, items, gizmos, etc. The stage is things like terrain, pipes, etc.
Sometimes you need to have two things overlap, like putting a piranha plant inside a pipe. Once they are both laid down, they become hard to work with. That is where the locks come in. If you click the stage lock, the pipe will get locked down and you can work on the piranha, and vice-versa with the actors lock.
Keyboard shortcuts
In the editor press '?' to see all the shortcuts available.
Hold shift when dragging to copy
When dragging something in the editor, if you hold shift it will make a copy of what you are dragging. This is especially useful when you need many copies of something that has to be configured. Configure the first one, then make copies.
Press 'p' twice to get playing again quicker
'p' toggles between playing and editing. If you die and want to try again, press p twice. This will reset the emulator and it's much faster than waiting for the game to let you try the level again.
You need a pretty fast machine for this tip unfortunately.
Vine and Wood Support
These two behave a little different from other entities. They automatically grow downward until they hit something. That's just how Nintendo made these entities work.
Scroll Stop
In the meta section of the item chooser is "Scroll Stop - Horizontal". This entity prevents the screen from scrolling past it. You can click on its arrow to change the direction of scrolling it stops.
With this entity, you can chop one room into several smaller rooms. The scroll stop will prevent the player from seeing other parts of the level.
Try Chrome if the emulator is too slow
I hate having to suggest this. But it is true that Chrome runs the emulator much faster than Firefox.
Ghost Player
The Ghost Player entity is found in the meta section of the entity chooser. It lets you start Mario at a temporary location in your room, for testing purposes.
- There can only be one Ghost Player per room. If you draw a new one, the old one gets erased. Use this to quickly set up a new ghost wherever you are working in your room.
- The Ghost Player always stays in slot 1 in the palette. So you can quickly switch to it by pressing 1 on your keyboard.
- When testing a room, if it has a ghost, that is where Mario will start the level, otherwise he starts in his real position.
- Whenever you save your level, all ghosts are removed.
E-Coin Photos
You can use an image file for your E-Coin. The image will get scaled to 24x24, so smaller images work better. The image's colors will also be converted to the E-Coin palette.

If you want to design a coin in the same style as Nintendo's, you can use this template image as your starting point. The e-coin palette is in the upper corner for reference. No need to delete the palette, when you use the image it will ignore all pixels outside the coin area.
Offensive images warning
if you publish your level with an offensive coin image, you may find your level unpublished. Repeat offenders will be banned from publishing levels. Crude, dumb, immature, etc images are fine.
Level size meter
The meter at the bottom of the editor shows your level's current size in bytes. If your level is too big, it may cause problems when playing it:
- Under 2024 bytes: You are fine, no problems
- 2025 to 2070 bytes: Your level will probably still work but might experience issues. If you can't get it down under 2024, you should test it thoroughly, especially warping between rooms.
- Greater than 2070 bytes: If it is above 2070 bytes, you will almost certainly hit issues such as the level not loading at all, or crashing when warping to another room.
Pipe warp exits
When making a pipe warp, you need to set the destination on the correct part of the exit pipe in order for the warp animation to look correct in game.
Here are the correct exit locations for all pipe orientations:

Making this easier and less error prone is on the TODO list.
Underwater Water
You can also make a standard water level which is a bit easier
Underwater Water is a normal tile entity. If you use it in a regular room, it will look and behave just like Choppy Water.
But if you choose the underwater background, then Underwater Water will be invisible, but maintain the swimming mechanic. So you can create an underwater level by choosing this background, and filling it up with Underwater Water (the paint bucket tool is handy for this). For coins, be sure to use the water version (it has a little water icon in the lower corner). The water version of coins allow Mario to keep swimming when he collects them.
This is how Nintendo made some underwater e-reader rooms. For example, the second room of Sea to Sky was built this way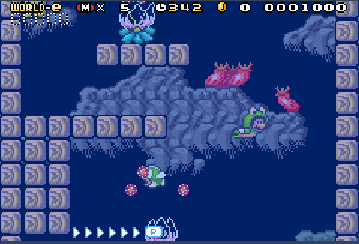
There are some downsides to this approach:
- Mario will make an "enter water splash" animation right when the level starts if you have him just sitting in the water. To avoid that, you can make him enter the room via a pipe. If you have him start out standing on something, the splash is less noticable.
- Filling a huge room with Underwater Water might slow the editor down. Hopefully I can make improvements here.
 If you don't do this, your floors will show up corrupted when playing your level.
How to make a standard water level
- Change the background of your room to underwater
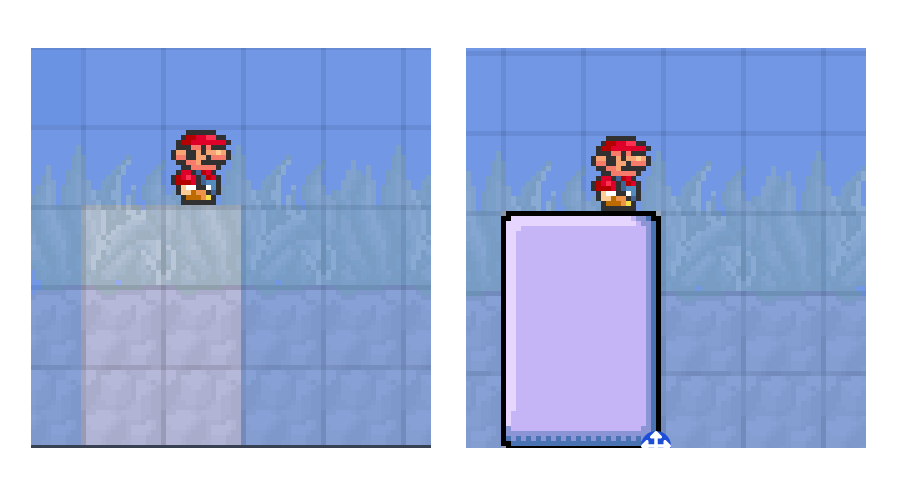
- Place the water entity (found under terrain in the water section) in the upper left corner of the room. It looks like this:water
There's no step three! Real Nintendo water levels also have some meta sprites that fix up scrolling and other things that make water levels a bit more polished. Those are still to come in Smaghetti.
Warning: The water entity will not completely fill out a tall level. Water can only be about 30 tiles tall.
Positioning Advance Coins
When your level has Advance Coins in it, the HUD has a little spot to tell the player which ones they have collected.
For each Advance Coin in your level, you need to specify which slot it will be in the HUD. The first coin a player finds is usually number 1, then number 2, and so on. That way if the player collects a coin and there are gaps in the HUD, they know they missed some coins.
Just click on your Advance Coins and assign them a position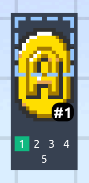
Sparse rooms might crash the game
If you have a room with only one or two entities in it, sometimes that can crash the game. We know this can happen with:
- Ice Block - Giant
- Wood Floor - Snow Covered
- Some of the Checkered Terrains
- and probably a lot more
How to setup the axe
The axe requires a pretty specific setup to work correctly. Here is one setup that will work.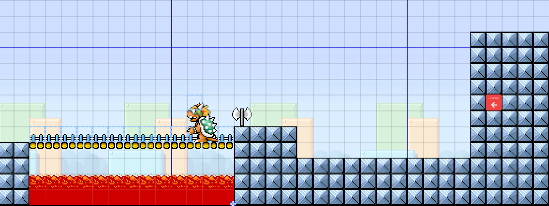 The scroll stop 16 tiles away from the axe seems to be key, without it the level often glitches. The bridge ideally should be 13 tiles long, as that is how much will get destroyed. The fortress bricks are not necessary, any solid tile will do. Classic Bowser is required, without him the game soft locks waiting for him to die.